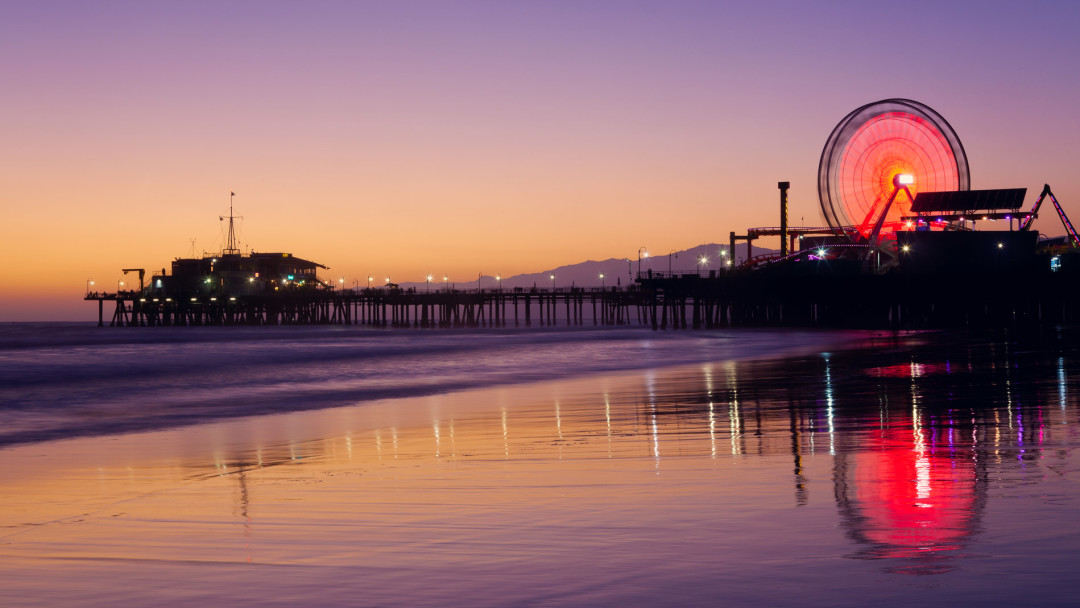
5DMKII+ 100mm f/2.8 L, 1/40 at f/8.0, ISO 500
Photographers have a fantastic chance to capture a 14% fuller moon this weekend, so I thought I’d quickly post a few tips on how to get great supermoon shots!
1. Capture the moon is when it is close to the horizon
The best time to capture the moon is during moonrise when the moon is closest to the horizon line. This is considered the moon’s “Magic Hour” and gives you the best opportunity to grab a shot of the moon in a surrounding landscape with some sunlight. It’s also the best time to get interesting cloud cover over the moon and to capture a more orange coloured moon. You can use this site to find out when the moonrise is where you plan to shoot.
2. Place the moon in a scene
Unless you have a super telephoto lens, taking a shot of just the moon itself in the middle of the sky won’t be compelling. Instead, capture the moon as it rises over a scenic landscape or city scape. If you are in the country side, capture the moon as it peeks through large, gnarled trees, or over hills and mountains. If you live by the sea side, grab a shot of the moon and it’s reflection as it rises over the ocean. City folk, can get amazing shots of the moon rising between buildings or over bridges.
3. Use a long lens
If you have a telephoto lens that’s 200mm or longer, now is the time to use it. If you want the moon all in focus, make sure you set your aperture to f/8.0 or narrower. My longest lens is the 100mm f/2.8, so I have to be a bit more creative. If you are dealing with a shorter lens, focus more on the moon within a scene than the moon itself.

5DMKII + 100mm f/2.8, 2.5sec at f/4.5, ISO 640
4. Use a tripod
Say no to blurry moon shots! Use a tripod. If you don’t have one, find a post, ledge or something to lean your camera against. A shutter release trigger is always handy, but if you don’t have one you can always use timer mode to avoid camera shake.
5. Use low ISO and a long exposure
To minimize noise, set your ISO as low as you can go. Try to stay under ISO 800 if you can and use your shutter speed to compensate. If you are shooting at moonrise you won’t need to do an exposure longer than about 2 seconds. In the dead of night, it might be longer. Don’t go beyond 25 seconds or you will get star trails and slight movement with the moon that can cause blurriness.
6. Use AEB bracketing for a supermoon HDR
Set your dSLR to auto bracketing and set it to -2/+2. Set your camera to 2 second timer mode. When you hit the shutter button it will automatically take the three shots sequentially. If you don’t know how to do this, pry open that coffee cup stained camera manual of yours, or google it :P By taking 3 shots, you’ll be able to capture a lot more detail in the foreground. Make sure you set your camera to spot metering for the best results.
7. Avoid digital zoom on point and shoots
Digital zoom on point and shoots and camera phones generally creates a pixelated hot mess. It’s better to take the shot full size and then crop in post.
8. Use live view to get focus
Switch on live view, zoom in on the moon, and grab focus on Manual mode. You might have to increase your ISO so that you can see the moon to get focus. Once you have focus, switch to camera mode and change your settings back. I find this the easiest way to get focus.
I hope this helps encourage you to get out and shoot. Now get out there and get some great shots of the supermoon!